
In this post, we’ll see how to host your brand new shiny ASP.NET Core web application on a Windows IIS server, so that it can be used at production level.
We’ll not cover anything about .NET Core development, or about IIS as a general purpose web server on Windows computers. If you have already created some ASP.NET Core application and run them locally (e.g. from Visual Studio), and you have some familiarity with IIS, this post will show you how to quickly host your ASP.NET Core application on IIS. The purpose of existence of this post is, the deployment process is different from that of full .NET Framework applications. Along the way, we’ll cover some basic concepts and explain few things in brief.
If you are not looking for hosting your application on Windows IIS, head over to this official documentation to learn how to host it on Linux, MacOS, Docker or Azure. If you want to learn about .NET Core, check out this series on Working with .NET Core 2.0.
TL;DR If you already know how to host a website on IIS and the deployment options for .NET Core applications (FDD & SCD), the most important step for hosting ASP.NET Core applications on IIS server is that, you’ll need to install the ASP.NET Core IIS Module.
Just before we jump in, one might be wondering, when ASP.NET Core application already comes with its own web server Kestrel, why would anyone host it on IIS! Kestrel is very lean (and fast), and does only what is required, i.e. serve a HTTP request with a response. On the other hand, mature web servers like IIS, Nginx, Apache etc. have much more functionality built into them. So, it is always advised to use Kestrel behind a full web server as reverse proxy, for production use. That means, the web server will receive the request from internet, and forward it to Kestrel after some general preliminary work and send the response back from Kestrel.

With a full web server, viz. IIS, you can do stuffs that are not possible with Kestrel. Some examples are - running multiple apps on same server sharing same port (e.g. mysite.com and othersite.com both listening to HTTP port 80), public domain & SSL certificate management, security & authentication, request limiting, caching, URL re-writing etc.
The basic steps to host an ASP.NET Core application on IIS are
- Publish or package your application
- Install/Enable the IIS server
- Install .NET Core Runtime & Hosting Bundle
- Create a new website for your application
- Configure
[1] Package your application
Build your application. Once successfully built, publish your ASP.NET Core web application. The 2 basic ways to publish are
- Right-click the project in
Visual Studioand select publish - Use the
dotnet CLIcommand for publish, i.e.dotnet publish
Whichever way you prefer among the two above, there are 2 types of deployment
- FDD or Framework-Dependent Deployment. Here, only your app, NuGet and other related packages & configurations are packed in the published package. It needs the .NET Core runtime to be present on the target machine to run. The published package is platform independent and can run on any supported platform like
Windows,LinuxorMacOS. Practically, FDD also has options like- Portable - totally platform independent (there are some catch though, see later). Total binary size is pretty small, comes with your own DLLs, some .NET Core base types and a few specific to different runtimes
- Runtime specific - not the ideal framework dependent, and comes with bunch of runtime specific files (that can avoid the catch situations of portable option above). Binary size much larger than the portable one
- SCD or Self-Contained Deployment. Here the whole (the required parts) .NET Core runtime and Kestrel web server is packed with your application code. So, you can directly deploy the package on a machine and run, it does not need the .NET Core runtime to be pre-installed on the machine. This is a platform specific deployment, so you must choose the target runtime at the time of publish e.g.
win-x64orlinux-x64. The binary size much larger compared those FDD options.
If you are deploying on Windows-IIS, generally you’ll have the .NET Core installed, so you can publish your applications as FDD win-x64, so that published binaries are not very large and also you avoid some issues with portable deployment.
Note: In .NET Core, you specify a target platform with a runtime ID. A runtime ID is nothing but a combination of a specific OS and processor architecture e.g. win-x86, linux-x64 or osx-x64.
Note: Actual size of the published binaries will vary based on the type, size & complexity of the project. And they’ll also change, probably, with future releases of .NET Core. But, just to give an idea, for one of my not-so-large ASP.NET Core MVC project with .NET Core 2.0, the sizes are - 10 MB (FDD Portable), 40 MB (FDD Win-x64) and 100 MB (SCD Win-x64).
[2] Setup IIS web server
Now you need IIS web server up & running on your Windows desktop or server. If you already have a running IIS, skip this step. Then you need to have ASP.NET Core Module installed on the system, that comes as part of the .NET Core Runtime & Hosting Bundle.
Install the IIS. IIS comes as part of Windows OS, so you basically need to enable them. Follow instructions from here and enable it from Windows features in Control Panel. Note that, you’ll need to have Administrator role to install and configure IIS.
[3] Install .NET Core Runtime & Hosting Bundle
Now we’ll need the ASP.NET Core IIS Module configured for IIS, which comes as part of .NET Core Hosting Bundle. This enables IIS to serve ASP.NET Core applications. Remember that ASP.NET Core web applications run as separate process with Kestrel web server. IIS needs this module to handle this setup.
- Next we’ll get .NET Core Hosting Bundle, which needs Microsoft Visual C++ to run. It’ll be auto downloaded during installation. But, if you are working on a machine that does not have active internet connection, you first need to install it separately. So, if you have active internet on target machine, skip step 1 & 2. Go to the download the latest version (
x64orx86) of Microsoft Visual C++ latest Redistributable. - Install the Microsoft Visual C++ latest Redistributable package downloaded, double click on installer or run from command prompt.
- Now, we’ll install the .NET Core Hosting Bundle. Go to .NET Downloads page. Click Download .NET Core Runtime, under
.NET Coremenu. It’ll download the required installers. - Install the Microsoft .NET Core Hosting Bundle. To avoid installing the x86 components on a x64 machine, run the installer from command prompt with
OPT_NO_X86switch e.g.
C:\Dir_with_installer> dotnet-hosting-2.1.4-win.exe OPT_NO_X86=1
Now, restart the system or restart IIS so that the ASP.NET Core module is recognized by IIS. You can do that without system restart with following commands in admin mode - net stop was /y followed by net start w3svc. It’ll show messages similar to following.
c:\SomeDirectory>net stop was /y
The following services are dependent on the Windows Process Activation Service service.
Stopping the Windows Process Activation Service service will also stop these services.

   World Wide Web Publishing Service

The World Wide Web Publishing Service service is stopping.
The World Wide Web Publishing Service service was stopped successfully.

The Windows Process Activation Service service is stopping.
The Windows Process Activation Service service was stopped successfully.

c:\SomeDirectory>net start w3svc
The World Wide Web Publishing Service service is starting.
The World Wide Web Publishing Service service was started successfully.
Just in case you thought what is this .NET Core Hosting Bundle that you just installed, the download page says it clearly.
The .NET Core Runtime & Hosting Bundle contains everything you need to run existing .NET Core apps, including hosting ASP.NET Core apps. The bundle includes the .NET Core runtime, the ASP.NET Core runtime, and if installed on a machine with IIS it will also add the ASP.NET Core IIS Module.
Now you might be wondering, if you published your application as SCD, why do you need this ASP.NET Core runtime? Shouldn’t you package be self-sufficient? The answer is yes, you app can run on its own (with Kestrel on Windows and with Kestrel/other web servers on other OS). But this runtime and module is required by IIS so that it can host your ASP.NET Core application, which was originally built to host full .NET Framework ASP.NET applications.
[4] Create a new website on IIS
If you have hosted any ASP.NET application on IIS before, you already know how to create a new website. If you have not done it before, follow step by step instructions from here.
Here, we’ll quickly create a new website on IIS for our application and do so minimal configuration.
- Open IIS. Search for IIS or run
inetmgrfrom run command (Windows + R). Remember you need to be an admin on the system to access IIS. - Under the server node on the left, right-click on
Sitesand selectAdd Website. Give the site a name (e.g. mycoreweb.com), use the same name forhostand select the directory where the app is published asPhysical path. - It’ll also create a new
app_poolwith the same name as the website host. You can use the same, select a different one or rename it if you want. It’s important you configure your application pool and set pipeline mode = Integrated, .NET CLR Version = No Managed Code. This basically tells the IIS it need not load full .NET Framework CLR, and the application will run on it’s own process. This is optional though. - If you just want to host a web app quickly and test on a dev machine, rather than step [2] it might be easier to just
Add Applicationon theSites > Default Web Site. If you give it a name likemysite, locally you can access this ashttp://localhost/mysiteon the browser.
Make sure your app_pool and the website are running, and you can browse your ASP.NET Core application now. See below for more configuration options.
[5] Configure
You should already have a running application, but few more configuration will help you manage & troubleshoot your application.
ASP.NET Core applications do not have a web.config (to know about configuration in .NET Core applications, read this), but when you publish it for Windows, a web.config gets generated. This is required by IIS and it has some minimal configuration.
It’s good you enable logs. Then it’ll create simple text logs for events like application start-up and errors, comes handy when trying to find problems. To enable logging
- Create a
logsdirectory in the application root i.e. in the published folder that IIS points to. This directory will host the ASP.NET Core Module stdout logs when stdout logging is enabled (see config below) - Turn on the logs by changing this flag
stdoutLogEnabled="true"in web.config
<?xml version="1.0" encoding="utf-8"?>
<configuration>
  <system.webServer>
    <handlers>
      <add name="aspNetCore" path="*" verb="*" modules="AspNetCoreModule" resourceType="Unspecified" />
    </handlers>
    <aspNetCore processPath="dotnet" arguments=".\Web.Project.dll" stdoutLogEnabled="true" stdoutLogFile=".\logs\stdout" />
  </system.webServer>
</configuration>
This is a FDD config, so the processPath points to the dotnet.exe that’ll run the process, and host the main web dll (e.g. Web.Project.dll). On the other hand, for SCD on Windows, it’ll create an executable for the main web (e.g. Web.Project.exe) and that’ll be the target process.
NOTE: When built with version ASP.NET Core 3.1.3 (April 2020), other changes are not required, just enable the logging with stdoutLogEnabled="true".
See the last section “Accessing the website locally and on network” if you are having trouble accesing the page from browser.
Some common problems
[1] If you get HTTP Error 502.5 - Process Failure that basically means IIS could not start the process, for which most common reason is - it could not find .NET Core executable (discussed just above). To fix this, the options are
- Add the .NET Core path to system environment PATH (e.g. C:\ProgramFiles\dotnet)
- Mention the full path to
dotnet.exein (for FDD) or.\Web.Project.exe(for SCD) inaspNetCore processPathattribute ofweb.config
[2] If you get an error that says dependencies manifest was not found, that means, well as it says. Some manifest files are missing that is used by the system. The error might look like this
Error:
  An assembly specified in the application dependencies manifest (Web.Project.deps.json) was not found:
    package: 'Microsoft.ApplicationInsights.AspNetCore', version: '2.1.1'
    path: 'lib/netstandard1.6/Microsoft.ApplicationInsights.AspNetCore.dll'
  This assembly was expected to be in the local runtime store as the application was published using the following target manifest files:
    aspnetcore-store-2.0.0-linux-x64.xml;aspnetcore-store-2.0.0-osx-x64.xml;aspnetcore-store-2.0.0-win7-x64.xml;aspnetcore-store-2.0.0-win7-x86.xml
This SO post and this GitHub issue talks about the problem. To fix this, you have to either of the following three options
- Install .NET Core full SDK (not just the runtime) on the server
- If it is a Framework Dependent Deployment, publish your app with specific runtime ID (e.g. win-x64 or linux-x64) rather than “Portable” (the catch mentioned above)
- Add this flag to your main
web.csprojand publish
<PropertyGroup>
    ...
    <PublishWithAspNetCoreTargetManifest>false</PublishWithAspNetCoreTargetManifest>
</PropertyGroup>
[3] If you get HTTP Error 500.31 - ANCM Failed to Find Native Dependencies, that might be because of multiple reasons. And the error text is generally not very helpful (for me, it said “The specified version of Microsoft.NetCore.App or Microsoft.AspNetCore.App was not found”).
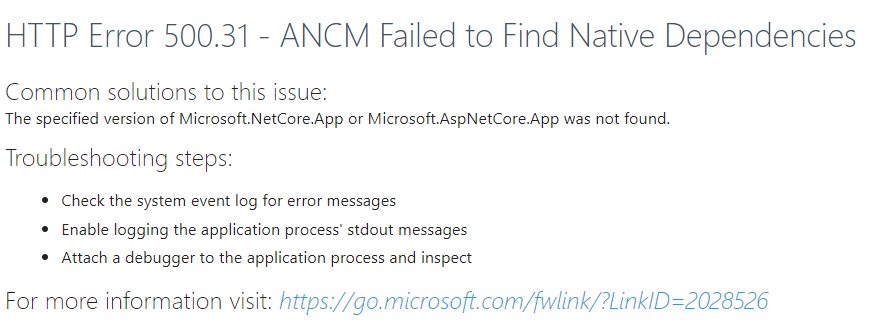
In my case, it happened when migrating to ASP.NET Core Runtime 3.1.3! It’s weird and hard to find the cause. As suggested in this SO post and GitHub issue, the fix is simple though. In the generated web.config file, the handler line might have modules="AspNetCoreModuleV2". Just remove V2 from it.
<handlers>
    <add name="aspNetCore" path="*" verb="*" modules="AspNetCoreModule" resourceType="Unspecified" />
</handlers>
[4] Some other common problems with fix suggestions are listed here
[5] Also good to know, standard IIS Logs are available at following locations
%SystemDrive%\inetpub\logs\LogFiles%SystemDrive%\Windows\System32\LogFiles\HTTPERR- In the Event Viewer, check this custom view to easily locate IIS event logs:
Event Viewer>Custom Views>ServerRoles>Web Server
Accessing the website locally and on network
This is not related to .NET Core, but if you are struggling to access your IIS hosted website on the same machine or over the LAN, you need to set the bindings properly and tweak the hosts file.
The hosts file bit is only required if you’re trying to access the website with a custom domain name like mycoolsite.com. The hosts file works like the first level DNS lookup, so you can setup any domain name to IP mapping here, for local use.
[1] To run the app locally with a custom domain name (e.g. mycoolsite.com in our example), add it to the Windows hosts file so that browsers can find it. For that, open any text editor in admin mode, open the file hosts file, and add the custom domain name with localhost IP address i.e. 127.0.0.1 on a new line, and save
# in C:\Windows\System32\drivers\etc\hosts
127.0.0.1 mycoolsite.com
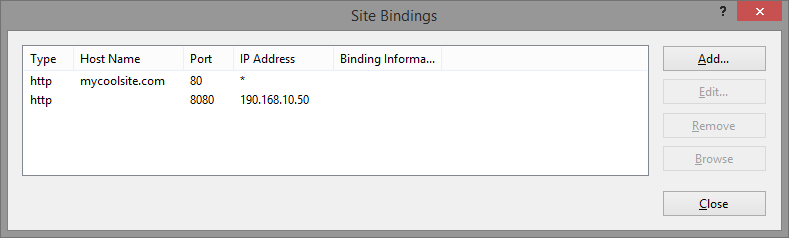
[2] To make it available over LAN, add another binding for your website with the IP address of the hosting machine and a port (check this post for help). So you’ll actually have two bindings for your site
#For Local:
Type: http
Ip Address: All Unassigned
Port: 80
Host name: mycoolsite.com

#For network LAN:
Type: http
Ip Address: <Network address of the hosting machine ex. 190.168.10.50>
Port: 8080 <make sure this port is allowed to have incoming traffic>
Host name: <Leave it blank>
Also, make sure that the port that you used (e.g. 8080) is allowed to receive inbound requests and is not blocked by firewall.
comments powered by Disqus