

Here, we’ll explore the benefits of using Nexus artifact repository manager for .NET projects, and see how to do that starting from ground up. If you are not familiar with artifact repositories or need to setup Nexus server first, read the Nexus artifact repository manager post.
Artifact repositories have been used in many open source and commercial software projects for many years, they are not super popular within the .NET community though. But now, they are being used increasingly in many .NET projects and there are reasons for that.
.NET packages - NuGet
We already have NuGet which does the job of package management, then why do we need a separate “artifact repository manager?”
Well, the global NuGet server nuget.org does its job well, but if we want to manage our own packages (for versioning, distribution, reuse etc.) we need to setup a local network NuGet server. While that is also pretty doable, wouldn’t it be great if you could have just one server infrastructure to hold & manage all (local & global) artifacts for all your development teams (think Maven, NuGet, npm, Bower, Docker etc.) with additional benefits like monitoring, housekeeping, security etc? If the answer is yes, Nexus is there to help you out.
Using a Nexus server comes with bunch of benefits…
- Host for own (personal/team/org) NuGet packages (pretty much like a on-premise NuGet server)
- One single source (see
nuget-groupbelow) for all your local & global (nuget.org) packages - Less network & storage use for nuget.org packages (in Nexus, packages are downloaded only once and cached. If the same package is needed again, the cached package is served & it does not download them from source again)
- Custom or LDAP based access control
- Manage other packages like
Maven,Docker,npm,Boweretc. with the same infrastructure and standards - Store and manage even raw binaries (e.g. any *.dll)
- All other features of Nexus like monitoring, logging, reporting, security, housekeeping etc.
NuGet & Nexus
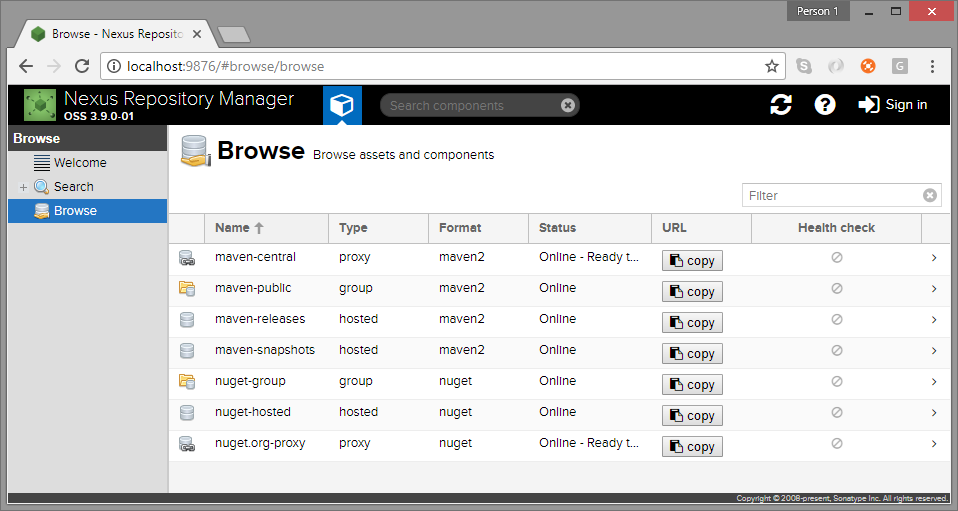
Nexus installation comes with preset NuGet settings. There are three repositories already setup for three different purposes, more can be added if required (To start with, we’re good with the preconfigured ones).
- Proxy - To proxy the nuget.org global repository. See
nuget.org-proxyin below image in the default instance of Nexus - Hosted - To host own packages, this works like a local NuGet server.
nuget-hosted - Group - A group to easily access multiple repositories, from a single source. The default
nuget-groupgroups both the proxy and host above, and it can be configured to add more repositories.
Note that NuGet repos in Nexus are not release or snapshot specific, they are of mixed type. Conventionally the pre-release ones are separated from stable ones with version semantics (same as NuGet manager in Visual Studio). By convention, pre-release or development versions will have a “-“ in version, like 0.1.0-beta or 1.2.7-preview. The stable ones follow numeric only versions like 2.1.1.
Packaging NuGet libraries
To have our own NuGet packages hosted in our Nexus server, we need to package our .NET libraries as NuGet and then publish them to the Nexus server.
The packaging of custom NuGet packages doesn’t have much to do with Nexus, they are the usual packaging process of NuGet as detailed in Packaging and publishing your NuGet document.
Here we’ll see a quick step-by-step process of packaging libraries as NuGet. The process basically involves creating a nuspec file that defines the package metadata, and using NuGet tools to create the actual package in nupkg format.
Note: I’m using a .NET Standard library with dotnet cli (.NET Core) tools for the packaging. The process will be slightly different for creating .NET Framework libraries with NuGet console or nuget.exe
- Create a new project or use an existing project (I used one of my existing
.NET Standard 2.0class library projectLinqExtensions) - Add required minimal metadata needed for creating
nuspec(anxmlmetadata file that describes theNuGetpackage. See below) in theLinqExtensions.csprojproject file (inside existingPropertyGroupnode). Alternatively a separatenuspecfile can be created, see below.
<PackageId>LinqExtensions</PackageId>
<Version>1.0.0</Version>
<Authors>Arghya C</Authors>
<Company>Arghya C</Company>
- Run the
packdotnet cli command from the project directory
$ dotnet pack
- It’ll create the
NuGetpackageLinqExtensions.1.0.0.nupkginsidebin/Debug. It’s done and ready for use! - Just to check, we can look at the
nuspecfile. Thenupkgfile is nothing but a compressed file. Un-compress it with your favourite tool and see theLinqExtensions.nuspecfile. The contents of the file is shown below
<?xml version="1.0" encoding="utf-8"?>
<package xmlns="http://schemas.microsoft.com/packaging/2013/05/nuspec.xsd">
  <metadata>
    <id>LinqExtensions</id>
    <version>1.0.0</version>
    <authors>Arghya C</authors>
    <owners>Arghya C</owners>
    <requireLicenseAcceptance>false</requireLicenseAcceptance>
    <description>Package Description</description>
    <dependencies>
      <group targetFramework=".NETStandard2.0">
        <dependency id="Newtonsoft.Json" version="11.0.1" exclude="Build,Analyzers" />
      </group>
    </dependencies>
  </metadata>
</package>
Publishing NuGet libraries
To host a NuGet package on server, we need to publish the local nupkg file to a NuGet enabled server (e.g. a network NuGet server or Nexus). Again, publishing to Nexus is not much different than standard NuGet server, only we need to setup the NuGet API key. The NuGet chapter of the Nexus book explains the process.
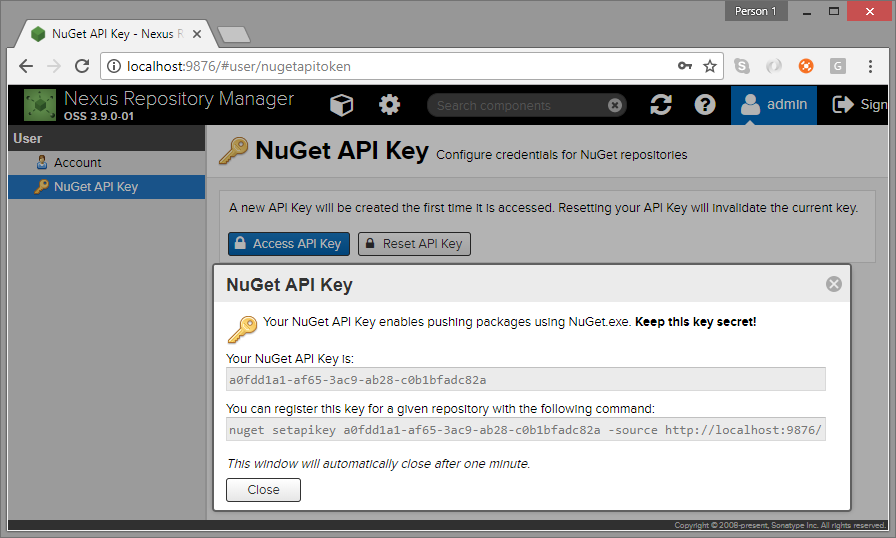
First we need to get the API key. The key is unique to each user. Login to the Nexus web application, go to the user section and click on the left menu NuGet API key. See image below. Remember, do not share your API key as that is the unique id given to you to verify with the Nexus server. (I’ve changed mine after taking the screenshot. You didn’t seen my key!)
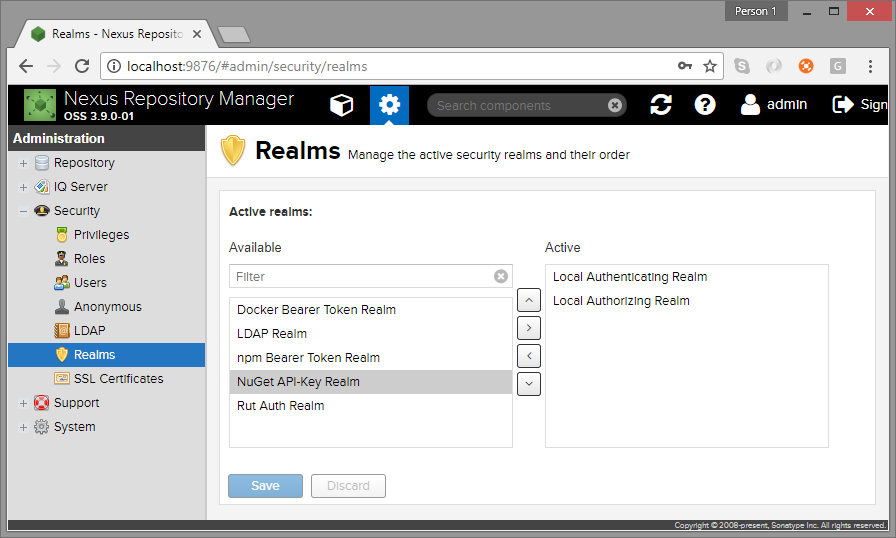
Note: For the NuGet API key to work, first the admin needs to enable the “NuGet API-Key Realm”. To do that, go to Realms section in Security menu and add it to the active realms. See image below.
Now, all you need to do is run nuget push command from the package directory with the key obtained above, to the repository source. We’ll be pushing the package to our nuget-hosted repository.
# command structure
$ dotnet nuget push {nupkg-name} -k {nuget-api-key} -s {repository-source-uri}
# actual command I issued (see above for key)
$ dotnet nuget push LinqExtensions.1.0.0.nupkg -k a0fdd1a1-af65-3ac9-ab28-c0b1bfadc82a -s http://localhost:9876/repository/nuget-hosted/
And voila! Our NuGet is now available on our Nexus manager
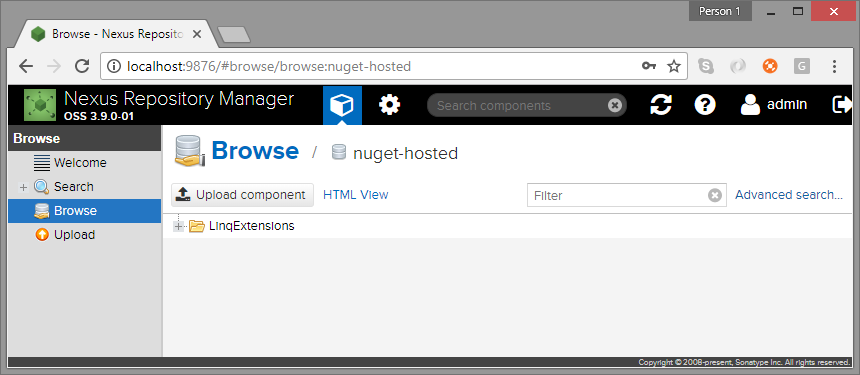
Notice it has a asset link like http://localhost:9876/repository/nuget-hosted/LinqExtensions/1.0.0, which can be used to download the asset directly.
Integrating with Visual Studio
Now that we have our artifacts as NuGet package on our Nexus repository manager, we can use it simply as NuGet source for development and build purposes. Here, we’ll setup our Nexus repository as NuGet source for Visual Studio.
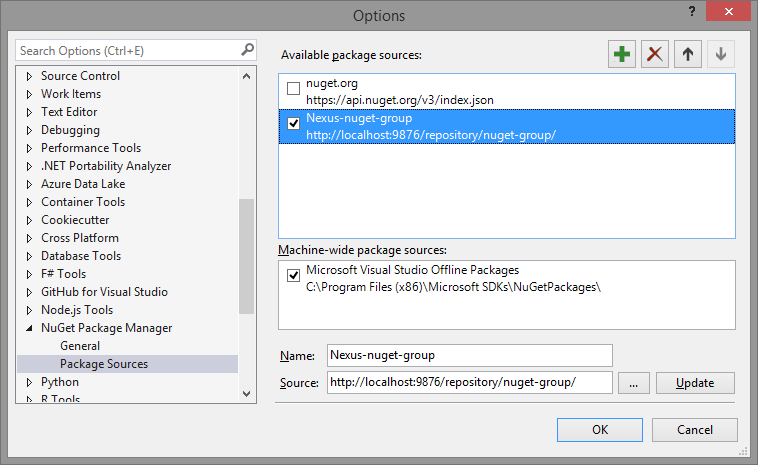
Go to the Package Sources, and add a new source pointing to the nuget-group so that we can access the global nuget.org packages as well as our custom packages from the same source.
- Go to
VS>Tools>Options>NuGet Package Manager>Package Sources - Add a new source (the big bold green plus)
- Since it’ll access the global packages as well, only this source would be enough for projects
# Give a meaningful name and the Nexus repository source
Name: Nexus-nuget-group
Source: http://localhost:9876/repository/nuget-group/
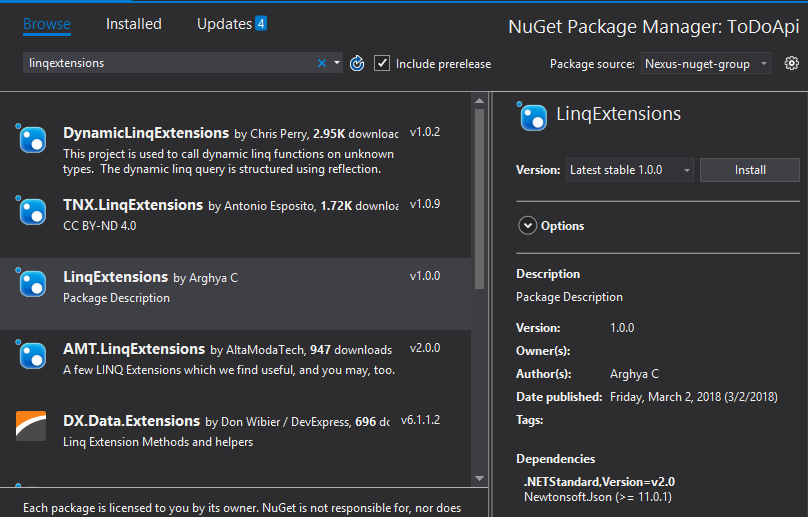
And now (along with nuget.org packages) my LinqExtensions package is also available as NuGet for all my projects!
NuGet packages from build
If we want to integrate the package creation and publishing in a build pipeline, we need to do both in an automated way. Here we’ll do a quick demo.
- We’ll not integrate into any specific build system, we’ll simply
packandpublishour NuGet from command line (same can be done from bash as well) - Here, we’ll use the traditional NuGet command line interface (not the new
dotnet cli) or thenuget.exe, which can be installed in the build server - As example, we’ll see one sample customization in the process and update the version dynamically at build time
First we’ll setup the NuGet command line
- Install the latest NuGet CLI, i.e. the
nuget.exefrom here. This does not come by default with Visual Studio, but the vsix extension (generally found in “C:\Program Files (x86)\NuGet\Visual Studio 2013”) is default. - The exe itself is the tool (it is not an installer). Save it to some meaningful location where you have access (I just copied it to the same “C:\Program Files (x86)\NuGet\Visual Studio 2013” for consistency)
- Add this path to system environment variables, so that
nugetcommand can be used from any location. My Computer -> right-click -> Properties -> Advanced system settings -> Advanced tab -> Environment Variables -> edit thePATHvariable and add the “path-to-nuget.exe” - Now NuGet commands can be run from any folder in
cmdorbash
Now that our nuget command line is etup for use, we can start creating NuGet pckages. Before first time use, we need to create a nuspec file. Once created, manually update the file with desirable details.
# go to the required project directory
$ cd /project-folder/
# create a nuspec file. This is one time activity
$ nuget spec
# manually update the nuspec file. We'll keep version as variable
# nuspec: <version>$version$</version>
The above activity is just one first use. Once we have the nuspec file, we can keep building our packages with the same nuspec. Following command will create and publish the NuGet package (with specific version)
# go to the required project directory
$ cd /project-folder/
# we already have nuspec file created above
# now create the package. Provide version value here
$ nuget pack MyLibrary.nuspec -properties version=1.0.0-beta
# publish to Nexus with correct key (see above) & source
$ nuget push MyLibrary.1.0.0-beta.nupkg a0fdd1a1-af65-3ac9-ab28-c0b1bfadc82a -source http://localhost:9876/repository/nuget-hosted/
Note: In the nuspec file we kept the version as variable $version$ so that we can put correct version number while creating the package. In the pack command we have provided a semantic version Major.Minor.Patch version with a pre-release suffix 1.0.0-beta. In actual build, we can also use revision number from the source control/build.
Here we saw how to setup and use Nexus artifacts server to manage NuGet dependencies for .NET projects. In the same infrastructure we can host other packages like Maven, Bower, Docker, npm etc. for the different teams across the organization.
References
- The Nexus book
- NuGet
- Create & publish NuGet with dotnet cli
- NuGet CLI refernce
- Nexus - .NET Package Repositories with NuGet
- Video - Nexus 2 with NuGet