

For those not familiar with the popular “artifact repositories”, it might sound like an unsual thing! But they are used all over the development community in many open source and commercial software projects, for many years now. Initially started mostly with Java world, they are now being used increasingly in many programming communities like .NET, Node, Ruby, Python, web development and more.
So what is an artifact repository manager? Going by the standard definition
An artifact repository manager is basically an application server that can store software artifacts in an organised and versioned manner, and can be used as source of artifacts for software projects. They are generally wired into application IDEs and build systems to store or fetch project artifacts (binaries, metadata etc.)
In all software projects, we have to deal with bunch of artifacts like code binaries, metadata files, configurations, xml files etc. In projects with moderate+ size, they can soon become a handful with storage, different tech stacks, multiple versions, inter dependencies and all. It can make everyday development, sharing code, building software pretty cumbersome. Here an artifact repository manager comes to rescue.
It simple manages repositories of artifacts - works as a single repository for many different types of libraries (e.g. Maven, NuGet, Docker, Bower, Ruby Gems, npm etc.), stores & manages different versions, proxy global libraries, hosts in-house or third party dependencies and provides security, analytics & many useful features.
At the core, it mainly does two things
- Manage & distribute software artifacts (project binaries and more)
- Proxy remote repositories (e.g. NuGet/Maven) to a local network server
Combined together, they greatly improve development, build and distribution of software systems.
Sonatype Nexus artifact repository manager
Sonatype Nexus is one of the most popular artifact repository managers available in market today. It was initially made popular with Maven projects for Java, but now they are used in almost all sort of software projects like .NET, Ruby, Node, Python etc. They can host any kind of raw binary files as well.
Nexus can run on all major OS (Windows, Linux, macOS), comes with great compatibility with different tech stacks (Java, .NET, Ruby, Node, Python, Docker etc.) and has lot of useful features like grouped repositories, security, monitoring, reporting, automated mails, housekeeping jobs and many more.
Alternatives? There are some similar alternatives like
Nexus basic concepts & terminology
Nexus generally has two types of repositories. So, any repository is either of
- Release repository - release specific, stable and incremented only on new release
- Snapshot repository - current, evolving, development repository
- Mixed - can have both (e.g. NuGet repos). Generally stable and pre-release versions have convention based versioning (
2.0.3vs1.0.9-preview)
Repository Coordinates (or identifiers)
- Group Id: Identifier for a group of related artifacts (e.g. company.web.library)
- Artifact Id: The artifact identifier (e.g. ViewModels)
- Version: The standard version like
1.0.3.514or1.0.9-preview
Collectively they are called GAV coordinates.
These coordinates generally translate into a URI to point to the assets, something like http://myrepo/my-group/library-name/package-1.0.dll
Users and admin
Nexus can have many user with different access rights. The default initial user is admin. To change or add new users, sign in with default admin credentials as admin/admin123. Now you can add new users, grant access to LDAP etc.
Installation
Nexus offers an enterprise version and a free OSS version to choose from.
For this setup guide, we’ll be using Nexus OSS version and we’ll install it on a Windows (8.1 Enterprise, 64-bit) system. The process is very similar to install on a different platform, follow the official installation guide.
I’m using the current latest OSS version 3.9.0-01. Here’s the step-by-step instructions
- Download the correct version from here
- Extract to
C:/Nexus(or any directory of choice with access). This extracted directories are basically the Nexus application. - It’ll have two sub directories
- The installation directory
nexus-3.9.0-01(conventionally$install-dir) - The data directory
sonatype-work(conventionally$data-dir)
- The installation directory
- In command prompt, go to directory
$install-dir\bin - Run command
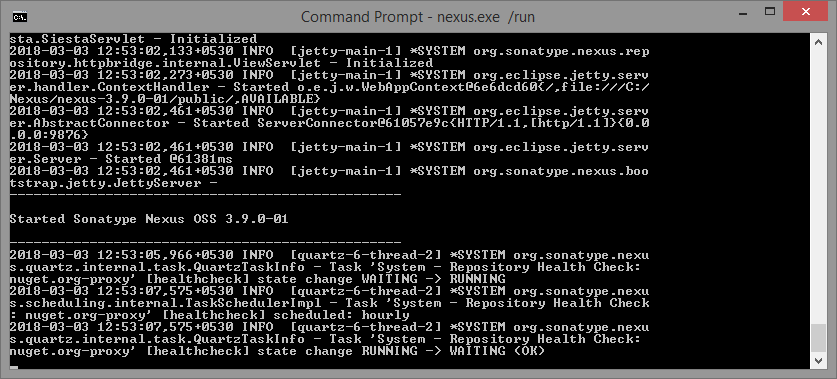
nexus.exe /run(command syntax is slightly different on others platforms)- It will show all the log outputs, and run the server
- If it starts successfully, it’ll display success message towards the end, like
- Started Sonatype Nexus OSS 3.9.0-01
- Press
Ctrl + Cto stop the server
Tip: If you want to be able to run the nexus.exe commands from any directory, add the bin path to system environment variables. My Computer -> right-click -> Properties -> Advanced system settings -> Advanced tab -> Environment Variables -> edit the PATH variable and add $install-dir\bin path (e.g. “C:\Nexus\nexus-3.9.0-01\bin”).
Note: If it fails with an error like “address already in use”, that means the default URI http://localhost:8081 is being used by some other application. So, we need to change the port.
To change the application port (I changed mine to 9876)
- Go to $install-dir\etc\nexus-default.properties
- Change the line
application-port=8081to another port (e.g. 9876)
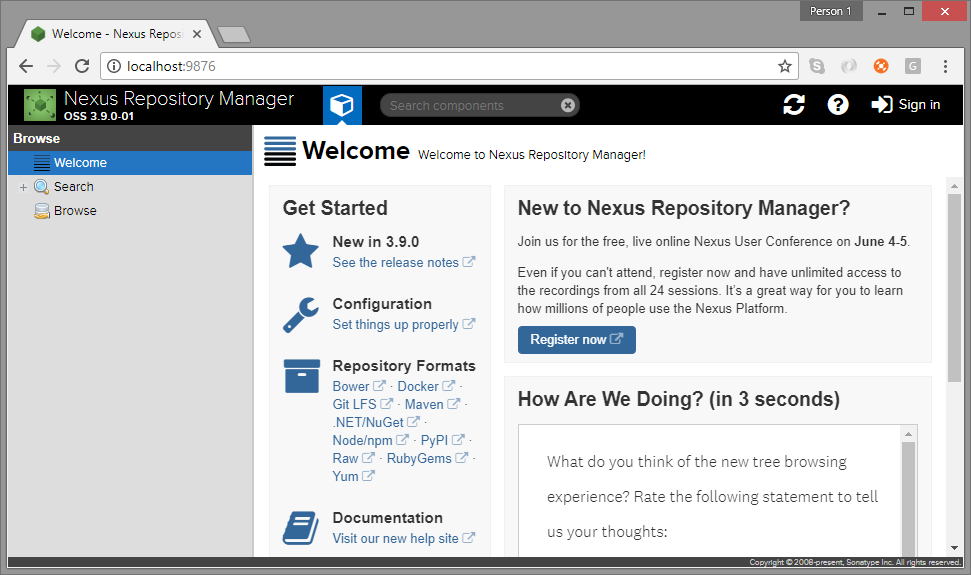
Once started successfully, the user interface can be accessed at http://localhost:9876/ (if not changed, default port is 8081)
If you log in with the admin user, you’ll see additional option. The settings menu is on top with the gear icon.

Note: For a production deployment, Nexus needs to be installed as a service, so that it can auto-restart and do other stuffs for more fail-safe operation. See instructions here.
Also, to get automated mail alerts, setup the SMTP server in settings.
Hosting raw files
As stated before, Nexus can store raw binary files (besides specialised repositories like Maven, NuGet, Docker, Bower etc.). That means, we can upload any file like config file or standalone binary, into Nexus and download as and when required. We’ll see how to do that.
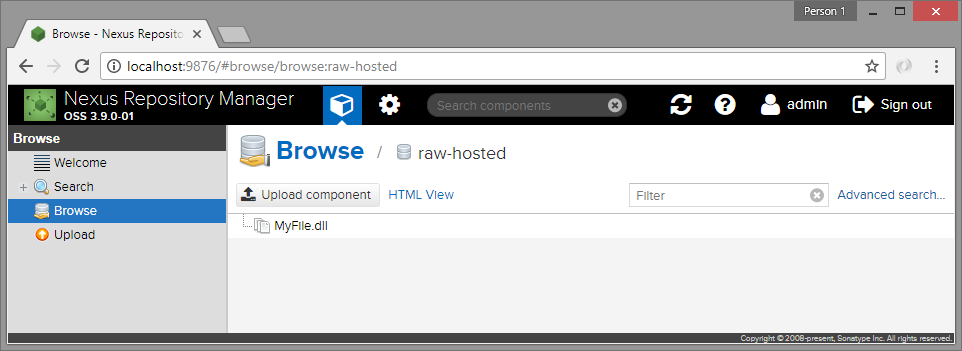
- First, create a new repository of type
raw (hosted), let’s name itraw-hostedfor convenience. You need to login as admin. - Once created, this repository can host raw binary files. For me, the uri is http://localhost:9876/repository/raw-hosted/
- Now we can upload any file to the repository as explained here. Basically we
http puta file to the repository URI with valid credentials (we have used admin user, but any user with access can be used) - Here we’re using the cURL tool for the same. Sample command below
# curl command to upload file to Nexus repo
$ curl -v -u admin:admin123 --upload-file MyFile.dll http://localhost:9876/repository/raw-hosted/
- To download the raw file, do a
http getto the asset uri which is like http://localhost:9876/repository/raw-hosted/MyFile.dll
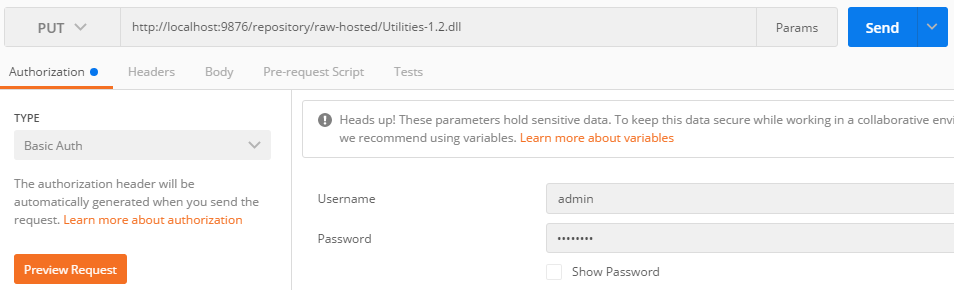
We can do the same with any REST client, either programatically or through GUI. Below we’ll see how to upload an artifact to raw-hosted repository using the Postman client GUI.
- Create a
PUTrequest for http://{raw-hosted-uri}/{resource-name} - Use
Basic Authwith username/password - it’ll automatically create anAuthorizationheader with “Basic Base64-encoded-credentials” - In
Body, add the raw file asbinary - Send the request
The actual http request looks like
PUT /repository/raw-hosted/Utilities-1.2.dll HTTP/1.1
Host: localhost:9876
Authorization: Basic YWRtaW46YWRtaW4xMjM=

# with the file data
Note: For a REST call to PUT an artifact to raw-hosted repository, we need to add a filename (need not match the actual filename) to the uri path.

In the next section, we’ll create a Nexus repository for .NET projects.
References
- What is artifact repository?
- Sonatype Nexus
- The Nexus book
- Official installation guide
- The user interface
- Admin and configuration
- Install as service for production
- Uploading raw artifacts